If you’re blogging and you don’t know even a little bit of HTML, you’re doing yourself a disservice. HTML tells a web browser how to display text elements on your web page. Learning and using HTML is fairly intuitive; I think you’ll find it very easy to learn. Knowing how to use HTML on your own web site or blog allows you to enhance your own posts and troubleshoot small issues that arise (like when your posts don’t appear quite the way you intended).
The ironic thing about computers is that, for all their apparent smarts, they have to be told what to do. And to tell a computer what to do, you have to speak its language. There are many programming languages out there that help browsers interpret web sites or make them function, but for today we’re talking about the most basic level of coding your web site: HTML. HTML stands for HyperText Markup Language and it’s the code that tells your browser how to read and display text elements on your web page.
HTML is pretty intuitive. If you use the HTML tab on your blog’s compose editor, you can see how your posts are marked up with HTML code. If you look at it closely, you’ll notice a few recurring things:
- HTML tags usually (but not always) come in pairs. These pairs are the opening tag (which tells the software that a command is coming) and a closing tag (which tells the software that the command is finished). For example, paragraphs are usually coded with <p> (the opening command) at the beginning and </p> at the end. The / is what tells the software that the command is ending.
- References (or URLs) are always in quotes. If you look at the HTML for a link, you’ll see something like this: <a href=”https://www.bloggingbasics101.com”>Blogging Basics 101</a>. That link looks like this on your page: Blogging Basics 101. The key to making sure the browser reads the link correctly is to ensure the URL you’re linking to is enclosed in quotes. And not just any quotes. If you use smart quotes (i.e., curly quotes), the browser doesn’t always read those and your link doesn’t work. To avoid curly quotes, don’t write HTML in Microsoft Word or Mac Pages. You can use your blog’s editor or even TextEdit or Notepad.
There are many good basic HTML tutorials online so I’m going to point you to them instead of trying to cover everything here:
- HTML Primer provides tutorials for beginning or advanced users.
- W3 Schools gives you everything you need to know about HTML and then a little more.
- Tizag has tutorials on learning HTML, but also provides tutorials for CSS, PHP, scripting, and databases so you can continue to learn.
Technically speaking, HTML is not a computer programming language; it’s a markup language. What I mean by that is, if you want to ensure a line of text is seen as a header (or bold or italics) in a browser, you have to tell the browser to display that text as you want it seen — you have to markup the text. In the case of a header, you would decide which level of header you want to display (e.g., Header 1, 2, or 3) and then use the HTML for that header. A header 3 would be marked as follows:
<h3>Text for Header Example</h3>
That text would appear in a browser as follows:
Text for Header Example
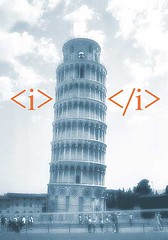
As you learn HTML and begin applying it, you’ll see that there are different markups for text emphasis. For example, you may see the markup to bold a word as <b>text</b> or <strong>text</strong>. Or, if you want your text italicized you may see it marked up as <i>text</i> or <em>text</em>. Does it really matter which HTML markup you use? Well, yes. It does. If you’ve ever debated someone, you probably understand the importance of semantics of the spoken word. Semantics in HTML are just as important. As Virginia DeBolt of Web Teacher explains,
“The <b> tag is indeed bold. It is purely visual and carries with it no semantic meaning to indicate importance or emphasis. Therefore, non-visual browsers (such as screen readers) get nothing from the <b> tag. It’s as if it doesn’t exist. The <strong> tag means strongly emphasized. It is interpreted visually in different ways by various browsers–often as bold. The <strong> tag always carries the semantic meaning of strong emphasis, even for non-visual browsers.
The sister tag <em> means emphasized, and it is often rendered in italic–but not always in italic. The <em> tag always conveys semantic meaning for emphasis. If you want italic for purely visual reasons (no attached emphasis), use <i>. If you want italic because you are giving the title of a book or movie, use <cite>, which conveys the semantic message that the words in italic are a citation.”
But semantics aren’t just important for interpreting text decoration correctly. Semantic HTML is important in SEO as well. Laura Scott of Rare Pattern explains:
“The use of semantic markup helps search engines index your content correctly. If you wrap a sub-header in <b> tags, then Google *may* consider it somewhat important, but Google will not consider it as important as a <h3> tag (commonly used to show a sub-header). Wrapping citation text in <i> and </i> gives you italics, but wrapping citation text in <cite> and </cite> not only gives you visual styling, it tells Google, Bing, etc. that this text (or link) is a citation. All these things will get increasingly important as search gets more sophisticated and smarter. The more ‘robot food’ we can give the search bots, the better for SEO.”
As you spend more time blogging, you’ll find that even a little knowledge about how to use HTML will help you control how your web pages are displayed. Take a little time and peruse the tutorials I’ve linked to and try out some of the things you learn, then please let me know if they’ve helped you.
![]() photo credit: Jesper Rønn-Jensen
photo credit: Jesper Rønn-Jensen
A version of this post was published at BlogHer.com.
I knew this would come up eventually. I’ve been avoiding learning HTML like the plague, but today’s the day I guess!
Comments are closed.